Most Vaping Devices Come With Incomplete Instructions!
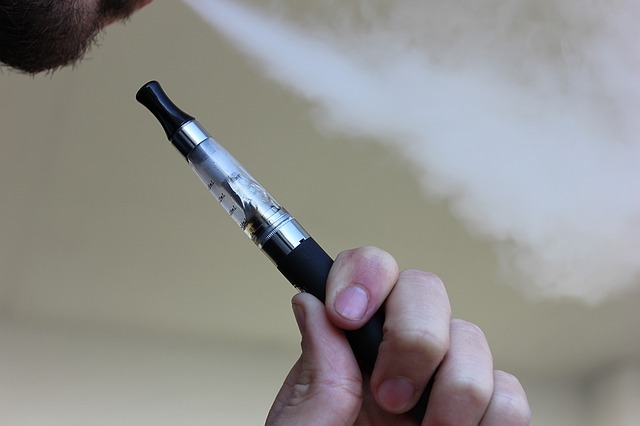 Do you know how to use your vaping device? I mean really know how to use it?
I had a personal run in with my KangerTech vaping pen recently and customer service was unable to help me (the people who actually make the pen!). A trip to the local vape shop gave me the answer – I needed to ‘charge’ the device prior to use! This little detail was definitely not in the instructions, which gave me the idea to share some tips with you.
In this article, we will conduct a ‘Vaping 101’ class and learn some techniques for using, cleaning, (and charging), your device – some which you might be unaware of. (This will be especially helpful to ‘newbies’!)
Priming
Do you know how your device heats the liquid inside? This happens when a small coil (usually located in a small, unscrewable section at the base) is heated when you hit the fire (on) button. What most people don’t know (and the instructions usually don’t tell you) is that this coil must be primed prior to use or it will burn out in short order. The fix? Priming.
- Add some oil to the tank – just enough to wet the exposed cotton wick in whichever device you have. Allow it to sit for 2-5 minutes, or –
Take several inhalations WITHOUT switching the device on. Do not hit the fire (on) button! This pulls juice into the cotton wicking to prepare it for vaping. If you do not do this, you risk the almost immediate failure of the coil (experience…)
When you hear a bubbling sound, you are ready to switch the device on and vape away! (this process might take longer for larger devices so be patient) - Priming is one of the most common mistakes people make when they bring their new device home. They either believe it was primed in the factory or don’t know that it must be done. I went through four coil made by one company that had them scratching their heads as to why they were failing. It took a trip to a local vape shop to get down to the issue (note: the manufacturer/distributor didn’t have a clue!).
- While we are on this subject, if you ever have a problem with your device, the local vaping shop will know everything about fixing it so I recommend using them when you have a question. The company that you purchased it from do not have it in front of them to see plus they may be call center employees without any insight into fixing problems.
Cleaning
Frequent cleaning is essential to extending the longevity of your coils. Mind you, they will burn out eventually and replacements will be needed, however; cleaning the tank and coil will help extend their life and ensure a clean flavor profile (especially if you use multiple flavors). This process is simple –
- Remove as many pieces as possible and put them on a clean towel or paper towel. Remember how they go back together! If necessary, write down the order of reassembly
- Fill a cup, or bowl, with hot water and let it cool a few minutes. You can nuke the water for two minutes and let it cool as you work on the other pieces and parts
- As this is cooling, you can begin cleaning by using a small, soft brush to gently brush debris from the parts you have removed. After the water has cooled, drop the parts in the water for a good soak
- Propylene glycol, vinegar, baking soda, and even grain alcohol can be used for an even deeper cleansing (please, don’t use all at once, duh)
- DO NOT drop anything electrical into the water soak! Just clean the tank with a microfiber cloth dipped in the above liquid(s). NEVER immerse electrical components of any type!
- A hair dryer can be used to thoroughly dry all parts or you can air dry/use that microfiber cloth
- If you really want to go all out, buy a small ultrasonic cleaner. Typically used for cleaning jewelry, they are now being used by the vaping public to clean atomizers
If you have tried all of the above and the flavor just isn’t working for you anymore, it’s time to buy a new coil head. If you vape a lot, you might want to consider a rebuildable model.
Type Of Liquid (Juice)
Two of the most common carriers for vaping liquid are Vegetable Glycerin (VG) or Propylene Glycol (PC). Juices with high VG levels are thick (viscous) thus the wick will not saturate quickly enough to coat and fill up the coil to atomize the liquid. This can create a heat buildup that can burn the wick, severely degrading the coil’s performance. Look for solutions that have a higher PG to VG ratio, such as 70 percent PG to 30 percent VG. Stay away from liquids that are 100 percent vegetable glycerine. Also, you must wait 30 seconds between puffs with high VG solutions.
Liquids with high sugar contents will also have a huge effect on performance. Sugars tend to caramelize on the wick from the high heat and if sugars build up on the coil, the wick simply cannot saturate. High sugar content juices will take a week off the life of your coil (or lower if you vape a lot).
Look for liquids with low sugar profiles, such as mint and tobacco. If these flavors don’t appeal to you, simply remember to read the label for sugar content. Keep it low.
Low Liquid Levels = Fried Coils
If you allow the liquid in your device fall below the level of the hole(s) of your coil, you risk rapid coil burn out. Coils are highly sensitive to most anything so it is in your best interest (and your pocketbook) to baby them.
Juice needs to cover the coil in your tank and if you are getting a burnt taste or a dry hit, check your juice level. A good rule of thumb is to never let it go below ¼ full.
Chain Vaping = Coil Failure
You cannot chain smoke a vaping device as you might a cigarette. This means that you cannot vape all day without a break or you will break your coil (or, at the very least, significantly shorten it’s life). This is why vaping devices have an automatic protection feature which will kick in after 5-10 seconds of straight firing. Usually, the button will give you multiple warning blinks.
Heed them.
Caring for your vaping device is an important task, especially if you have invested in a pricey one or have built your own. However, many (most?) manufacturers do not include these instructions in the kit (no instructions = more purchases, perhaps?). So it is vital to do your research into finding the cleaning method that you find most effective. This will help ease you way through the process and give you many years of pleasurable vaping!


